
Flocking a Newtonian Telescope
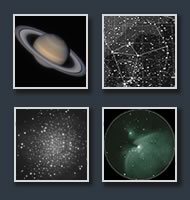
A Newtonian reflector's open tube (or any other OTA for this matter) is an attractive target for unwanted stray light, which can come from anywhere: Moon, street lights or even bright stars. This light bounces off telescope's inner surfaces and eventually enters the focuser and the eyepiece. As a result - the background lightens up and the image contrast is harmed.
There are several solutions to this problem: Attaching an extension the the tube (which is also useful for dealing with dew), baffling the telescope, or flocking it from inside with light absorbing material. Baffling is probably the most effective method (if calculated and done properly), while flocking is the easiest. The idea behind flocking is to increase light absorbing properties of the inner surfaces of OTA by covering it with a special material. It allows absorbtion of the unwanted light, rather than reflecting it. In practice, in unbaffled tube, some stray light will always get to the eyepiece, but flocking can minimize the harm.
Flocking Material
Usually a telescope is painted with black, matte paint inside. However this paint is usually far from being an ideal light absorber, especially at oblique angles. See the following photo for a comparison of a special flocking paper (left) and my Orion reflector's native paint (right).
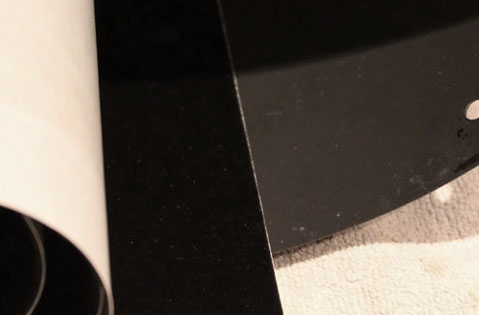
"Protostar" flocking paper compared to the native black paint
For this purpose I used flocking paper from Protostar. It's VERY black, relatively easy to install, and resistant to moisture (according to manufacturer). "ScopeStuff" offers similar material either. It comes in many forms, while mine was a boxed roll of black self adhesive "mesh" paper, with waxed protective sheet over the sticky layer.
Telescope Disassembly
In order to apply the material - it's recommended to disassemble all parts from the telescope: Main mirror cell assembly, secondary mirror assembly with the spider, focuser assembly and finder holder. The following instructions are for Orion (or Skywatcher) reflectors.
To disassemble the main mirror - place the telescope upright, with the bottom on the floor. Then unscrew all small phillips screws located on tube's perimeter, right above the mirror cell (marked with "C" on the following diagram). After all screws have been removed - carefully rise the tube. The mirror cell assembly should remain on the floor, and it's a good idea that a helping person will hold the mirror assembly during this operation. The main mirror then should be put somewere safe for a while (or get washed, since you have alreadey disassembled the telescope). Next step is to unscrew by hand 4 bolts which hold the spider (marked with "B"). You should hold the secondary mirror holder with one of your hands while doing it, to prevent the whole assembly falling down. The focuser should be removed by unscrewing 4 phillips screws (marked with "A). Don't confuse screws which hold the focuser in its place with the collimation screws (usually small allen ones). Last - the finder holder should also be removed from the OTA.
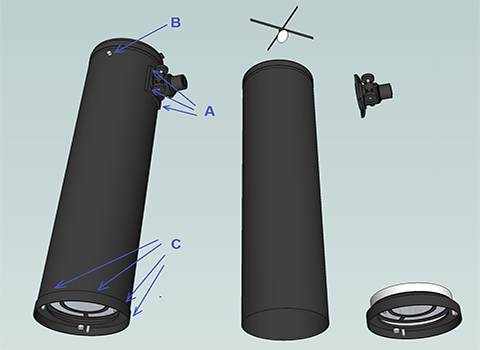
Disassembly procedure of an Orion (or a Skywatcher) Newtonian OTA
Flocking Procedure
After the disassembly - some measurements should be made, in order to cut the appropriate rolls or sheets of the material. Try keeping the overlaps to a minimum, or better avoid them, since the flocking paper doesn't stick well to itself.
If your tube is big enough (6-8" or larger) - the flocking paper can be simply rolled and inserted into the OTA. Then you can start removing the protective layer (white in the following image) from one of roll's edges, which is parallel to the tube, and stick the flocking paper (black) to the tube's surface.
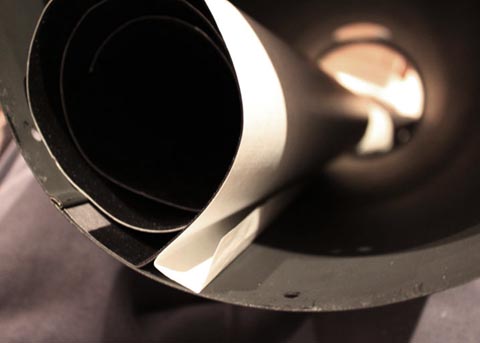
Unrolling and attaching the flocking paper to the OTA
Unroll the paper inch by inch, gradually removing the protective layer, and attach the exposed flocking material. After each few inches - use your fingers to smoothen out the material, while applying some pressure. There is an alternative method of applying the material using long slices 2-4 inches thick. It can be useful is the tube is small. After the flocking is done - protostar recommends making longitudinal cuts every 3-4 inches with a sharp knife, to compensate for OTA's temperature expansion. The holes for screws and focuser can be easily cut out using a sharp knife, from inside.
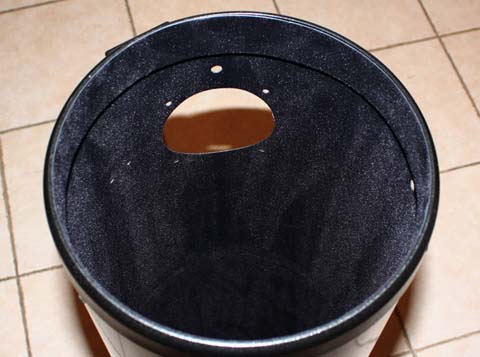
A fully flocked newtonian tube
Apart from the tube - you may flock the secondary mirror edges, focuser inner parts, mirror clips, and basically any surfaces inside the telescope which you believe may play a role in reflecting unwanted stray light into the focuser. See a flocked secondary mirror edges in the following example.
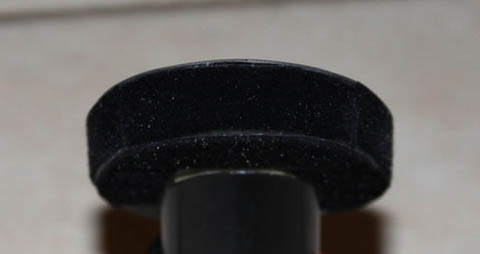
Flocking the edges of a secondary mirror
Most important is to flock the inner OTA surfaces which are directly visible from the focuser, the focuser's inner surface (if it's not blackened) and, if possible, the area near the primary mirror. Therefore if you do not wish to disassemble and flock the entire telescope - at least flock these areas (shown in red).
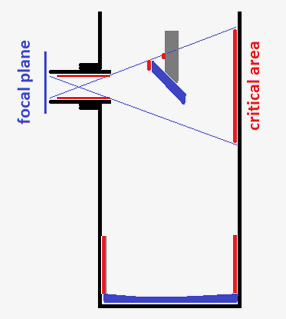
Everything visible from the focal plane should be blackened with a flocking material

10" Newtonian partially flocked in the area which is directly visible from the focuser